Every devoted artisan will tell you that the accuracy and dependability of your tools are critical to generating high-quality work. You’re constantly seeking ways to improve your workshop experience, whether you’re a seasoned expert or a DIY enthusiast.
The DP Pro Drill Press Table System may help with that. This game-changing tool will transform your drilling efforts, providing excellent precision and simplicity of use that will have you wondering how you ever got by without it.
In this blog article, we’ll look at the DP Pro’s remarkable features and see how it can revolutionize your workshop skills, making every job a snap. So buckle up and prepare to discover your new favorite tool update!
 DP-Pro Drill Press Table Key Features:
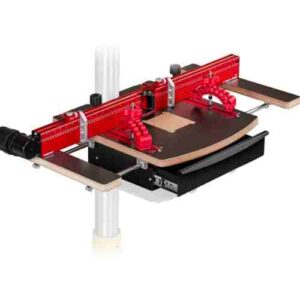
- Spacious dimensions: The DP Pro has a large table surface, providing enough room for even the most intricate tasks.
- Strong construction: Constructed of quality, heavy-duty materials such as MDF and laminate, the DP Pro is built to last.
- Adjustability and precision: The DP Pro’s fence system has simple sliding clamps that provide exact alignment for accurate drilling.
- Built-in scale and T-tracks: The integrated scale and T-tracks simplify measurements and adjustments while allowing various accessories for increased functionality.
- Maintains a clean and safe workstation: The DP Pro’s inbuilt dust-collecting system eliminates dirt, ensuring a clean and safe workspace.
- Increases efficiency and safety: The DP Pro improves visibility by decreasing dust accumulation, allowing for more precise drilling and a safer work environment.
- Ergonomic design: The DP Pro has an ergonomic design that reduces stress and strain, making it easy to use for long periods.
- Simple assembly: The DP Pro’s simple assembly procedure guarantees that you spend less time setting up and more time working.
- Universal fit: The adjustable mounting brackets on the DP Pro enable simple integration with most drill press types, making it a flexible addition to any workshop.
- Accessory readiness: The DP Pro’s T-tracks and fence system allow it to accept a variety of accessories and add-ons, greatly enhancing its potential.
Advantages:
- Improved precision and accuracy: The improved features of the DP Pro contribute to more precision, resulting in higher-quality work and less material waste.
- Versatility and adaptability: The DP Pro’s strong construction and configurable features make it perfect for amateur and professional workshops.
- Time-saving features: The DP Pro’s simple installation and quick adjustments save time and increase productivity.
- Increased safety: The integrated dust collecting system maintains the workstation clean and reduces debris, lowering the risk of accidents and improving vision while drilling.
- Economical: The DP Pro’s long-lasting durability and greater productivity make it an excellent choice for any workplace.
Proper Installation and Alignment:
Step 1:
Collect the necessary tools. Assemble all essential installation equipment, such as a wrench, screwdriver, and measuring tape or ruler.
Step 2:
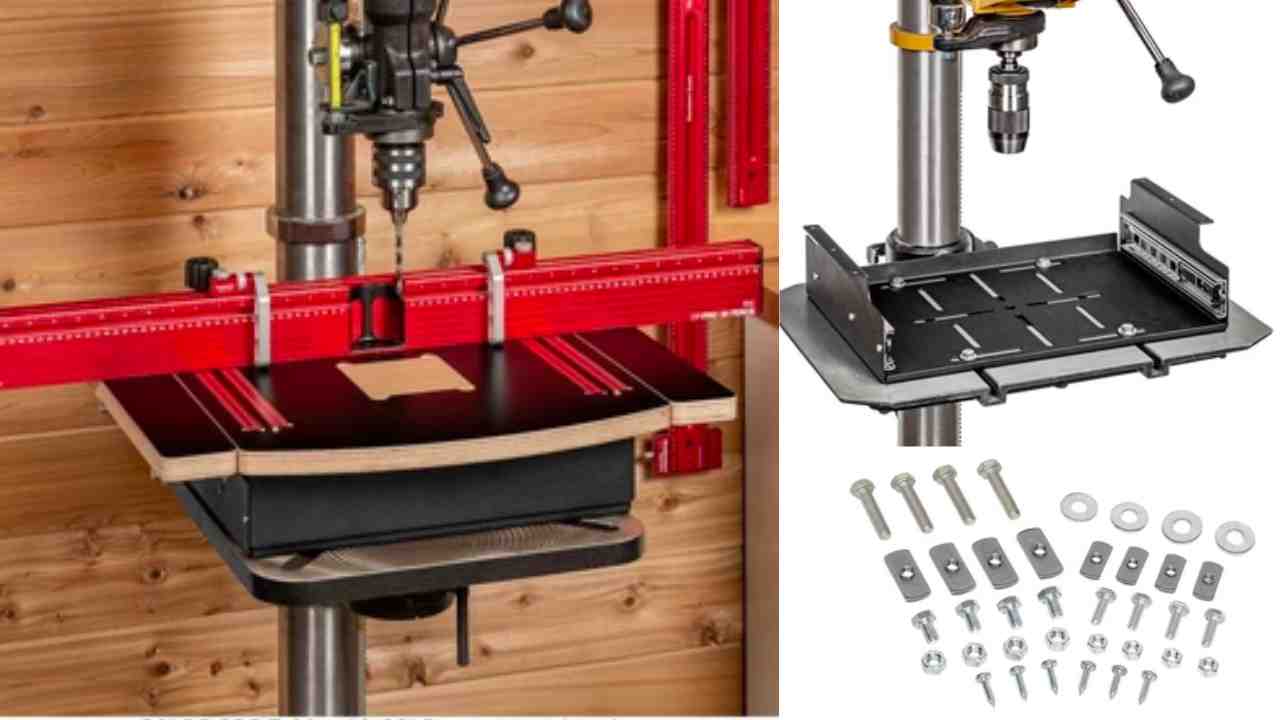
Put the table together. Install the fence rails and brackets to the table surface following the DP Pro handbook’s directions, ensuring all components are secure and in their right placements.
Step 3:
Attach the table to the drill press. Loosen the adjustable mounting brackets and line them with the drill press’s base. Put the DP Pro table on the drill press base, leveling and centering it. To keep the table in place, tighten the mounting brackets.
Step 4:
Put up the fence Align the fence rails with the T-tracks before sliding them onto the fence rails. Ensure the fence is perpendicular to the table’s edge, and tighten the clamps to secure it.
Step 5:
Center the drill press chuck on the table. Reduce the drill press chuck to slightly above the tabletop. Modify the table location as necessary to keep it centered under the chuck. Using a ruler or measuring tape, check the distance between the chuck and each table corner.
Step 6:
Install the built-in dust collecting system (if applicable). Attach the dust collecting hose to the dust port on the DP Pro table and secure it with a hose clamp. Connect the other end of the hose to the dust-collecting system in your workshop.
Step 7:
Adjust the fence alignment (optional) If necessary, fine-tune the fence alignment using a straight edge or square. Ensure the fence is perpendicular to the table’s edge and parallel to the drill press chuck.
Step 8:
Check the alignment. Drill a test hole in a scrap material to confirm proper alignment. Make any required modifications and repeat the test until the desired accuracy is achieved.
Regular maintenance and cleaning:
- Dust removal: Clean the table surface, fence, and T-tracks with a gentle brush or cloth after each use to remove sawdust or debris. Empty the dust collecting system regularly and examine the hose for clogs or damage.
- Table surface care: Avoid using strong chemicals or abrasive materials while cleaning the tabletop. Instead, wipe down the table with a wet towel soaked in mild detergent, then dry it with a soft, lint-free cloth. If required, apply a small layer of paste wax to the table surface to minimize friction and protect it from dampness.
- Lubrication: Use a dry silicone or Teflon-based spray lubricant to lubricate the moving elements of the table system, such as the fence rails, clamps, and T-tracks, regularly. This will guarantee smooth running and keep corrosion at bay.
- Fence and accessory adjustments: Regularly inspect the fence and accessories for wear and tear. Tighten any loose screws, bolts, or clamps and, if necessary, replace any damaged components.
- Alignment checks: Check the alignment of your DP Pro table system regularly and make any required modifications to maintain maximum accuracy while drilling. This involves checking the table’s alignment with the drill press chuck and ensuring the fence is perpendicular to the table edge.
- Drill press maintenance: Remember to maintain your drill press well. Clean and lubricate its working components, such as the spindle and quill, and check the belts and pulleys. Check the drill press for precision and alignment regularly, correcting as required.
- General inspection: Look for evidence of wear, damage, or loose components on the DP Pro table system. Fix faults immediately to preserve the table’s performance and a safe working environment.
Why the DP Pro Stands Out Among Competitors?
- Excellent quality and construction: The DP Pro Drill Press Table System is made of high-grade materials such as MDF and laminate, assuring durability, stability, and longevity. The sturdy design ensures a stable workstation capable of withstanding the rigors of both woodworking and metalworking jobs.
- Superior fence system: The DP Pro has simple sliding clamps, integrated scale, and T-tracks for perfect alignment and drilling accuracy. Because of its adaptability and versatility, it can easily fit various tasks and materials.
- Large table surface: With its wide proportions, the DP Pro provides an enormous workspace that can handle even the most intricate tasks. The big table surface allows you to easily work on larger projects, giving you a substantial edge over rival models.
- Integrated dust collection: The DP Pro’s built-in dust collection system is a noteworthy feature, assisting in maintaining a clean and safe workstation by quickly eliminating dirt. This improves vision and drilling accuracy while contributing to a safer work environment.
- Versatility and adaptability: The DP Pro’s flexible mounting brackets make it simple to combine with most drill press types. This feature lets you replace your old drill press with a high-quality table system without purchasing a new machine.
- User-friendly design: The DP Pro’s ergonomic form and simple construction procedure make it simple and pleasant to use, regardless of your skill level. The DP Pro’s design appeals to a broad spectrum of consumers, from amateurs to pros.
- Accessory readiness: The T-tracks and fence system on the DP Pro are intended to accept a variety of accessories and add-ons, greatly enhancing its potential. Its versatility enables you to tailor the table system to your unique requirements and tastes.
Frequently Asked Questions (FAQs)
1. Is the DP Pro Drill Press Table System compatible with all drill presses?
The DP Pro is designed with adjustable mounting brackets that allow it to easily integrate with most drill press types. However, it is essential to check the compatibility of your specific drill press model before purchasing the DP Pro.
2. Can the DP Pro handle both woodworking and metalworking tasks?
Yes, the DP Pro’s sturdy construction and versatile fence system make it suitable for both woodworking and metalworking tasks. Its strong materials and design ensure that it can withstand the demands of various types of projects.
3. How do I clean and maintain the DP Pro Drill Press Table System?
Regular cleaning and maintenance involve dust removal, table surface care, lubrication of moving parts, fence and accessory adjustments, alignment checks, drill press maintenance, and general inspection. Following the maintenance tips provided in the article will help keep your DP Pro in top condition and ensure its longevity.
4. What accessories can be used with the DP Pro?
The DP Pro’s T-tracks and fence system are designed to accept various accessories and add-ons, enhancing its functionality. Some common accessories include hold-down clamps, stop blocks, feather boards, and additional fences. Always check the compatibility of the accessories with the DP Pro before purchasing.
5. Do I need any special tools for the installation and alignment of the DP Pro?
No special tools are required for the installation and alignment of the DP Pro. Basic tools such as a wrench, screwdriver, and measuring tape or ruler are sufficient for proper installation and alignment.
6. How do I know if my DP Pro is properly aligned?
After following the installation and alignment steps provided in the article, you can drill a test hole in a scrap material to confirm proper alignment. Make any necessary adjustments and repeat the test until the desired accuracy is achieved.
Final words:
We’ve gone through the outstanding features and advantages of the DP Pro Drill Press Table System in this blog article, demonstrating how it can potentially change your woodworking and metalworking operations.
The DP Pro provides unsurpassed accuracy, adaptability, and simplicity of use with its high-quality, sturdy design, innovative fence system, and integrated dust collecting. Its interoperability with most drill press types and ability to handle various attachments strengthens its position as an industry leader.
Upgrade to the DP Pro Drill Press Table System, whether you’re a seasoned practitioner or a DIY enthusiast, is an investment that will pay off in better project outputs, decreased waste, and expanded workshop capabilities. Take your skill to new heights and see the DP Pro’s game-changing difference. Your workshop will be grateful!
- Where are WEN drill presses made? - April 2, 2023
- Where are Rikon drill presses made? - April 1, 2023
- Where are Powermatic drill presses made? - April 1, 2023