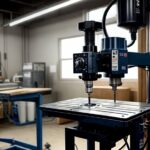
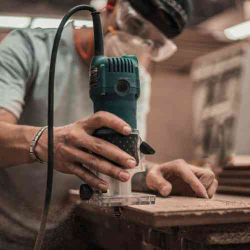
The inability to alter the table height is among the most prevalent complaints regarding drill presses. A drill press table lift may help with this. This blog article will look at the advantages of a drill press table lift and walk you through the installation and usage process.
A drill press table raise may improve the efficiency and accuracy of your job, whether you’re a professional carpenter or a do-it-yourself enthusiast. Well, let’s get this party started!
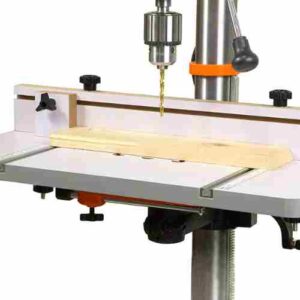 What is a Drill Press Table Lift?
A drill press table lift is a mechanism used to change the height of a drill press’s table. The table is the flat surface on which the workpiece is put for drilling, sanding, or polishing. A drill press table lift allows the operator to accurately raise the height of the table to meet various workpiece sizes and shapes.
Types of drill press table lifts:
- Manual Drill Press Table Lift: This is the most basic and least expensive alternative. It adjusts the height of the table using a hand crank. Manual lifts are great for amateurs and small-scale manufacturing but may be time-consuming and exhausting for large-scale production.
- Hydraulic Drill Press Table Lift: Hydraulic lifts employ pressurized oil or fluid to move the table up and down. They are more costly than manual lifts but function quicker and with less effort. In industrial contexts, hydraulic lifts are often utilized.
- Pneumatic Drill Press Table Lift: Pneumatic lifts move the table up and down using compressed air. In terms of speed and convenience, they are comparable to hydraulic lifts, although they are often less costly. In the automotive and industrial sectors, pneumatic lifts are often employed.
- Electric Drill Press Table Lift: Motorized lifts employ an electric motor to raise and lower the table. They are the most costly, but they are also the quickest and simplest to use. Motorized lifts are often employed in large-scale manufacturing environments where speed and efficiency are crucial.
- Crank Handle Drill Press Table Lift: A crank handle attached to a lead screw is used to modify the table height. It functions similarly to a manual lift but with more accuracy and control. Precision machining and metalworking applications often use crank handle lifts.
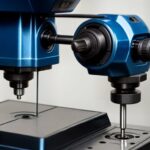
How Drill Press Table Lift works?
The threaded rod has a lead screw, which is a sort of screw intended to move a nut along its length as it is spun. The nut on a drill press table lift is connected to the table’s bottom, and the lead screw is linked to the drill press frame.
As you spin the handle or motor, the lead screw twists the nut, causing the table to move up or down. The user controls the pace and direction of the movement, allowing for exact changes to the table height. Some drill press table lifts include a locking mechanism that enables the operator to lock the table at a predetermined height.
A drill press table lift’s design might vary based on the kind of lift and the manufacturer. The core idea, however, remains the same: the threaded rod and lead screw operate in tandem to move the table up and down the drill press frame.
Advantages:
- Precision: One of the primary benefits of using a drill press table lift is the ability to make precise adjustments to the height of the table. This is especially important when working with small or delicate workpieces that require precise drilling.
- Efficiency: By using a drill press table lift, the user can quickly and easily adjust the height of the table to accommodate different sizes and shapes of workpieces. This can save time and effort, especially in production settings.
- Ergonomics: Adjusting the table height manually can be tiring and even cause strain on the back and shoulders. Using a table lift can help reduce the risk of injury and discomfort associated with manual adjustments.
- Flexibility: A drill press table lift can be used with various drill press models and sizes, making it a versatile accessory for any workshop.
- Consistency: With a drill press table lift, the user can ensure that the table height remains consistent throughout the drilling process, resulting in more accurate and consistent results.
- Safety: By reducing the need for manual adjustments, a drill press table lift can help improve safety in the workshop. The user can keep both hands on the workpiece and avoid having to reach underneath the table to make adjustments.
How to Install a Drill Press Table Lift?
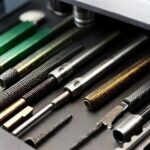
Tools and materials required:
- Drill press table lift kit will include the lift mechanism, hardware, and installation instructions.
- Wrenches: You may need metric and standard wrenches to install the lift.
- Screwdriver: A screwdriver may be needed to tighten screws and make adjustments.
- Allen wrench: An Allen wrench may be needed to tighten set screws and other small fasteners.
- Drill and bits: You may need to drill holes in the drill press table to attach the lift mechanism.
- Safety glasses: It’s important to wear safety glasses when using power tools.
- Gloves: Gloves can provide protection and improve grip when handling tools and hardware.
- Measuring tape: You may need to measure and mark the drill press table to ensure proper installation.
A step-by-step guide to installing a drill press table lift:
- Collect all of the equipment and supplies needed for the installation.
- Before beginning the installation, read the manufacturer’s installation instructions.
- Loosen the clamping bolts that keep the existing table in place on the drill press.
- Place the lift mechanism on the table’s bottom, matching the holes in the mechanism with the holes in the table.
- Use the included hardware to secure the lift mechanism to the table. To guarantee a secure fit, tighten the bolts or screws equally.
- Return the table to the drill press and tighten the clamping bolts to secure it.
- Attach the lift mechanism to the drill press frame using the included components. Ensure that the lift mechanism is aligned with the drill press frame and glides smoothly up and down.
- Set the lift mechanism to the appropriate height and test the lift’s performance by moving the table up and down many times.
- Make any changes to the lift mechanism or table height as needed.
- Lubricant should be applied to the lift mechanism and any moving components to guarantee smooth functioning.
- Lastly, use a scrap piece of wood or metal to test the drill press and lift mechanism to confirm that everything works correctly.
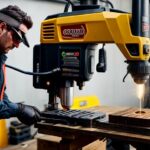
How to use a drill press table lift safely and effectively?
- Read the user handbook: Before operating the drill press table lift, it is essential to read the manufacturer’s user manual. The guidebook will include operating instructions as well as safety considerations.
- Use safety equipment: Always wear safety glasses and gloves to protect your eyes and hands from debris and sharp edges while operating a drill press table lift.
- Keep your workstation clean: A messy environment might be dangerous while utilizing a drill press table lift. Before using the lift, ensure your workspace is clean and clutter-free.
- Secure the workpiece: Clamp or vise the workpiece to the table before drilling. This will keep the workpiece from shifting or slipping during the drilling process.
- Change the table height: Using the lift mechanism, set the table height to the suitable level for the drilled workpiece. This will assist in guaranteeing precision and accuracy.
- Inspect the hole depth: Use the depth stop to verify that the drill bit does not penetrate too far into the workpiece. This will protect the workpiece and the drill bit from harm.
- Always switch off the drill press and lift mechanism after using them. This will assist in avoiding accidents while also extending the life of the drill press and lift mechanism.
- Maintain the lift mechanism: Clean and lubricate the lift mechanism regularly to guarantee smooth functioning. This will help the lift last longer and reduce wear and tear.
Common mistakes to avoid during installation:
- Incorrect alignment: One of the most typical installation errors is failing to correctly line the lift mechanism with the drill press frame and table. An incorrect alignment might cause the lift to perform badly or not at all.
- Over-tightening or under-tightening hardware: Under-tightened bolts and screws may loosen with time, while over-tightened bolts and screws can peel or damage the threads. While tightening hardware, following the manufacturer’s recommendations and applying the proper torque levels is critical.
- Improper hole placement: If the lift mechanism’s holes are not correctly aligned with the holes in the table or drill press frame, the lift mechanism may bind or perform badly. Be sure to precisely measure and note the hole location before drilling.
- Using the incorrect size drill bit: The drill bit might result in holes that are too small or too big, preventing the lift mechanism from attaching correctly. Use the right drill bit size as indicated by the manufacturer.
- Failure to oil the lift mechanism: Failing to lubricate it might cause it to perform inefficiently or fail prematurely. Apply lubrication to all moving components as directed by the manufacturer.
- Failure to observe safety measures: It is critical to follow all safety precautions during installation, such as wearing safety glasses and gloves and exercising care while handling equipment and hardware.
Precautions for safety:
- Put on protective equipment such as safety glasses and gloves.
- Maintain a clean and debris-free work environment.
- Use clamps or a vise to keep the workpiece from sliding.
- Correctly adjust the table height to guarantee accuracy and precision.
- Employ the depth stop to protect the workpiece and drill bit from damage.
- Choose the proper drill bit for the material being drilled.
- Begin with a moderate speed and gradually raise it as required.
- Keep your fingers and hands away from moving components.
- After done, turn off the drill press and lift mechanism to avoid accidents and prolong their lifet.
Maintenance and care:
- Clean the lift mechanism and table regularly to eliminate dust and dirt.
- To guarantee smooth functioning, lubricate the lift mechanism with an appropriate lubricant.
- Examine the lift mechanism for evidence of wear or damage, and replace any worn or broken components.
- Inspect the lift mechanism and table alignment to verify good functioning.
- Follow the maintenance plan indicated by the manufacturer for your lift mechanism.
- Keep the lift mechanism dry and clean, avoiding excessive temperatures, moisture, and dust.
- Only use the lift mechanism for its intended purpose and within the operational limits specified.
Frequently Asked Questions (FAQs)
1. Can I install a drill press table lift on any drill press model?
While drill press table lifts are designed to be versatile and compatible with various drill press models, it’s essential to check the manufacturer’s specifications to ensure that the lift is compatible with your specific drill press. Some lifts may require minor modifications or additional hardware for proper installation.
2. How do I determine which type of drill press table lift is best for my needs?
Consider factors such as your budget, the frequency of use, the size and weight of the workpieces you typically work with, and the level of precision required for your projects. Manual lifts are more affordable but may be time-consuming, while hydraulic, pneumatic, and electric lifts offer faster and more effortless operation but at a higher cost.
3. How often should I lubricate my drill press table lift?
The frequency of lubrication depends on factors such as the type of lift, the environment in which it is used, and the frequency of use. As a general rule, it’s recommended to lubricate the lift mechanism at least once every few months or more frequently if used heavily or in a dusty environment. Always follow the manufacturer’s recommendations for lubrication.
4. Can I use a drill press table lift for other purposes, such as sanding or polishing?
While a drill press table lift is primarily designed for adjusting the table height during drilling operations, it can also be used for other tasks that require precise table height adjustments, such as sanding or polishing. However, always ensure that the lift mechanism and table can support the weight and forces generated during these operations.
5. Is it difficult to install a drill press table lift by myself?
Installing a drill press table lift can be a relatively straightforward process if you follow the manufacturer’s instructions and have the necessary tools and materials. However, if you’re unsure about any aspect of the installation process or lack the necessary tools, it’s recommended to seek professional assistance or consult with an experienced friend or colleague.
Final words:
Finally, a drill press table lift is an important workshop tool that may assist in increasing the precision and efficiency of your drilling operations. There are several varieties of lifts on the market, and choosing the one that best meets your requirements is essential.
While installing a drill press table lift is a reasonably straightforward operation, following the manufacturer’s instructions and taking all essential safety measures is critical. Frequent maintenance and care are also required to maintain the durability and safety of your lift system.

Follow the advice when using a drill press table lift to guarantee safe and successful operation. By following these suggestions, you can get the most out of your drill press table lift and increase the efficiency of your workshop.
- Where are WEN drill presses made? - April 2, 2023
- Where are Rikon drill presses made? - April 1, 2023
- Where are Powermatic drill presses made? - April 1, 2023