Do you like playing cribbage and want to add a personal touch to your gaming nights? Or are you looking for a one-of-a-kind, handmade present for someone who enjoys card games? There is no need to look any further! We will teach you how to make your cribbage board without a sophisticated drill press. With a little time, ingenuity, and some elbow grease, you can make a one-of-a-kind cribbage board that will be a favorite at your next party or as a thoughtful present.
Making a cribbage board without a drill press may seem difficult, but outstanding results are perfectly attainable with the appropriate technique. Although a drill press is well-known for offering precision, stability, and consistency when drilling holes, we’ll show you how to overcome these issues using other approaches and equipment.
Making a cribbage board without a drill press requires accuracy, patience, and inventiveness. By employing several basic but efficient strategies, you may ensure perfectly spaced and consistent holes that provide smooth gaming, exactly like a professionally built board.
In this article, we’ll address the difficulties of making a cribbage board without a drill press by offering useful hints, alternative equipment, and step-by-step directions to make the procedure as easy and entertaining as possible. Soon, you’ll be well on your way to creating a beautiful, useful, and one-of-a-kind cribbage board that will dazzle your friends and family at game evenings or special events.
 How to make a cribbage board without a drill press?
Materials required:
- Wooden board: Use high-quality hardwood such as oak, maple, or walnut (common size: 3.5″ x 12″ x 0.75″).
- Ruler or measuring tape: Used for precise hole marking and spacing.
- Use a pencil or fine-tip marker when designing your design and noting hole placements.
- Masking tape, often known as painter’s tape, controls drilling depth while protecting the board surface.
- Optional wood finish or paint: Use different finishes to personalize or protect your board.
- Felt pads (optional): Attach to the bottom corners to prevent scratching and sliding during games.
Tools required:
- Corded or cordless drill: A main tool for drilling holes with customizable speed and comfort.
- Drill bits of various diameters are required for peg holes and other features; utilize brad or spur point bits.
- Hammer and nail set: Aids in creating precise pilot holes or indentations for drilling.
- Sandpaper: Smooth the board surface using varying grits, beginning with coarse and progressing to finer grits.
- Clamps or vise (optional): Use clamps or a vise to secure the board to the work area for stability during drilling.
- Brushes, foam applicators, rags, and a ventilated workplace are all optional wood finish/paint equipment.
- Use protective eyewear and use ear protection while working on the project.
A. Designing Your Cribbage Board:
The design of your cribbage board is an important phase in the process. Taking the time to thoroughly organize your board’s layout, hole locations, and any other features will assist in guaranteeing a seamless procedure and a professional-looking finished result.
B. Selecting the board arrangement
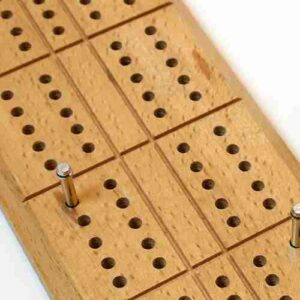
Many cribbage boards have a traditional configuration with two or three parallel tracks of 60 holes each, with extra holes for the game’s start, skunk lines, and finish. Its style is classic and well-known, making it a popular option.
Consider constructing a creative or bespoke cribbage board to add a personal touch or create a one-of-a-kind board. Non-linear tracks (such as circular or zigzag patterns), including theme aspects (such as sports, wildlife, or hobbies), or even customizing the board with engraved names or dates are all possibilities.
C. Layout of the hole positions
Measure and mark the distance between holes using a ruler or measuring tape to ensure they are uniformly spread throughout the tracks. Hole spacing is typically 1/4″ to 1/2″ apart. However, this might vary depending on your design. Mark the location of the holes using a pencil or fine-tip marker.
Maintaining appropriate alignment and spacing throughout gameplay: To enable seamless gaming, the holes must maintain proper alignment and spacing. Double-check your measurements and use a straightedge or ruler to verify that the holes are correctly aligned along the tracks.
D. Suggestions for Avoiding Mistakes
- Make a rough drawing of your design on paper first: Before marking your wooden board, sketch your design on paper. This will enable you to make changes, experiment with alternative layouts, and readily see the end product.
- If you need more confidence in drawing or measuring freehand, try utilizing a template or stencil for your hole locations. You may get printable templates online or use computer software to build your own.
- Check measures twice: Before drilling, double-check your measurements and hole placements. This will aid in preventing errors that might jeopardize the functioning or aesthetics of your cribbage board.
 Drilling the Holes:
Drilling the holes is an important stage in constructing your cribbage board. Good technique and attention to detail guarantee that holes are consistent and accurate for smooth performance.
A. Choosing the Correct Drill Bit Size
Choose a drill bit the same size as your pegs to ensure a tight fit. Cribbage pegs typically need a 1/8″ or 3/32″ drill bit. However, this might vary depending on the pegs you choose.
B. Appropriate drilling technique in the absence of a drill press
- Creating pilot holes or indentations with a hammer and nail set: Gently tap the nail set with a hammer at each designated hole location to generate pilot holes or indentations. This will guide your drill bit and aid in accurate drilling.
- Controlling drilling depth using masking or painter’s tape: Wrap a piece around your drill bit to designate the desired hole depth. This will assist you in maintaining consistency and avoiding drilling through the board.
C. Drilling holes for peg storage
Drill bigger holes at the chosen storage position if your design contains peg storage. The number of pegs and the necessary storage depth will determine these holes’ size.
D. Maintaining consistent and uniform hole depth
As you advance, check your holes for uniform depth and spacing. Adjust your technique as needed to ensure evenness and accuracy throughout the procedure.
Completing Your Cribbage Board:
It’s time to complete your cribbage board once you’ve properly drilled the holes. Putting the final touches on the board will improve its beauty and preserve it from wear and tear.
A. Sanding down the board
- Using sandpaper, smooth the surface and edges of your cribbage board. For the best results, begin with a coarser grit (e.g., 80 or 100), then graduate to finer grits (e.g., 220 or 320).
- Before proceeding to the following stage, ensure that any rough edges, splinters, and defects have been eliminated.
B. Painting or applying a wood finish (optional)
- Apply a wood finish or paint to your cribbage board if desired. Wood stain, clear varnish, and acrylic paint are all popular choices.
- Follow the manufacturer’s application and drying recommendations. Make sure you’re working in a well-ventilated location.
C. Using felt pads (optional)
Consider putting felt pads on the bottom corners of your cribbage board to prevent it from scratching surfaces or sliding during play.
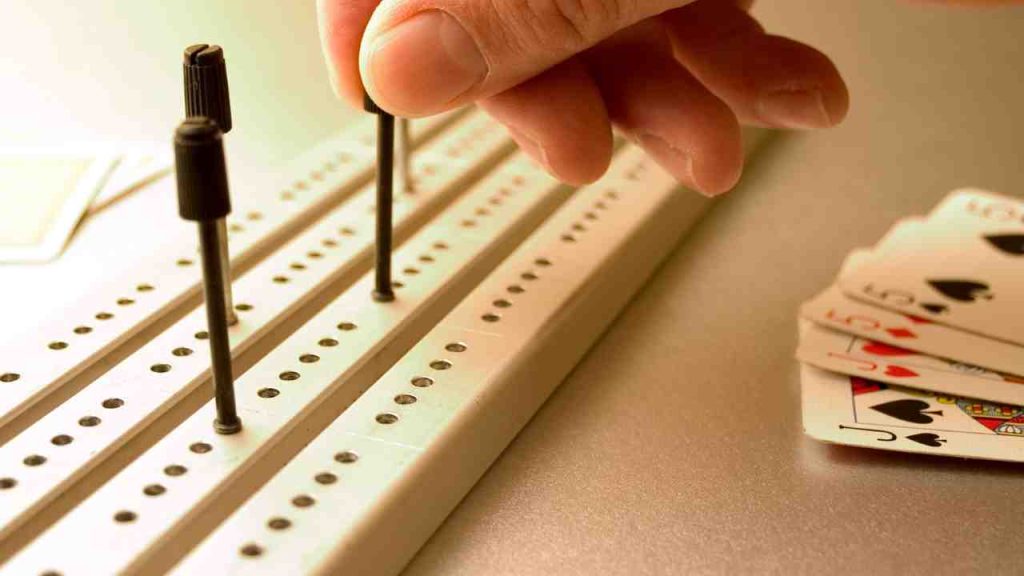
D. Inserting the pegs
Put the pegs into their respective holes, ensuring they fit tightly without falling out or being difficult to remove.
E. Examining your completed cribbage board
- After all of the final touches have been applied, review your cribbage board to confirm it is ready to use. Examine the holes for consistency, peg fit, and smooth surfaces.
- Make changes or revisions to ensure a high-quality, working game board.
Frequently Asked Questions (FAQs)
1. Can I use any type of wood for my cribbage board?
Yes, you can use any type of wood for your cribbage board. However, hardwoods such as oak, maple, or walnut are recommended for their durability and appearance. Softwoods may be more prone to damage or wear over time.
2. How deep should the holes be for the pegs?
The depth of the holes for the pegs should be slightly deeper than the length of the pegs’ narrow end. This ensures a snug fit without the pegs protruding too much. Typically, a depth of 1/4″ to 3/8″ is sufficient for most pegs.
3. Can I create a cribbage board with more than three tracks?
Yes, you can create a cribbage board with more than three tracks if you wish. However, keep in mind that adding more tracks may require a larger board and may increase the complexity of the design and drilling process.
4. How can I ensure that my holes are drilled straight without a drill press?
To ensure straight holes without a drill press, use a hammer and nail set to create pilot holes or indentations at the marked hole locations. This will help guide your drill bit and aid in accurate drilling. Additionally, use masking or painter’s tape to control drilling depth and maintain consistency.
5. Can I add a custom design or engraving to my cribbage board?
Yes, you can add a custom design or engraving to your cribbage board for a personalized touch. This can be done using wood carving tools, a wood burning tool, or even a CNC machine if you have access to one. Just make sure to plan your design carefully and take your time to achieve the best results.
6. How do I maintain and care for my cribbage board?
To maintain and care for your cribbage board, keep it clean and free of dust by wiping it with a soft cloth. If you’ve applied a wood finish or paint, follow the manufacturer’s recommendations for maintenance and reapplication if necessary. Store your board in a cool, dry place when not in use, and avoid exposing it to extreme temperatures or humidity.
Last words:
Making a cribbage board without a drill press requires careful design, the correct materials and equipment, accurate drilling, and finishing touches. Even without specialist equipment, you may make a useful and appealing cribbage board by following the instructions and practices provided in this article.
Making a cribbage board with your own hands provides a special feeling of pleasure and success. You’ll not only have a gorgeous, one-of-a-kind gaming board to enjoy, but you’ll also have something to talk about with friends and family.
If you’ve been inspired to make your cribbage board, we urge you to do so! The procedure may be satisfying and pleasant, and you’ll have a tangible reminder of your efforts. Remember to share your works with others and motivate them to construct their cribbage boards.
- Where are WEN drill presses made? - April 2, 2023
- Where are Rikon drill presses made? - April 1, 2023
- Where are Powermatic drill presses made? - April 1, 2023