Hello there, fellow do-it-yourselfers! We’ve all heard that a well-equipped workshop is a woodworker’s dream. The drill press is an absolute game-changer for precise drilling. These bad boys, however, can be very expensive, and only some have the capacity or income for a specialized drill press.
But what if we told you you could make your drill press out of something you most likely already have in your toolbox—a cordless drill?
That’s correct! In this blog article, we’ll teach you how to convert your cordless drill into a drill press, allowing you to tackle jobs with better precision and control. We’ll lead you through the process, from acquiring the necessary components to creating your drill press. So, roll up your sleeves and get to work!
DIY: How to make a drill press with a cordless drill?
Materials:
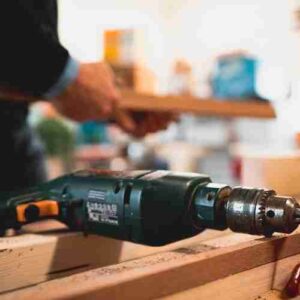
- The show’s star is the cordless drill, which will power your drill press.
- Drill press stand: A strong support structure that holds and guides the drill.
- Use plywood or MDF board to make a work surface for your drill press.
- Wood screws are used to secure the work surface to the drill press stand.
- Use a C-clamp or drill press vise to keep your workpiece firmly in place while drilling.
Tools:
- Screwdriver: Used to assemble the stand and secure the work surface.
- Use a ruler or tape measure to acquire exact measurements for cutting and placement.
- Use a level to verify that the work surface and drill press stand is aligned.
- Use a pencil or marker to mark measurements and direct the construction process.
 How Do I Choose the Best Cordless Drill for Making a Drill Press?
Step 1: Determine the required power and torque.
While utilizing your DIY drill press, consider the tasks and materials you’ll be dealing with. For example, if you want to drill into hardwood or metal, you’ll need a more powerful drill with greater torque.
Step 2: Check the battery life.
Seek a cordless drill with longer battery life, which will guarantee your drill press stays operational for longer. Because of their performance and lifespan, lithium-ion batteries are a popular option.
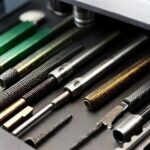
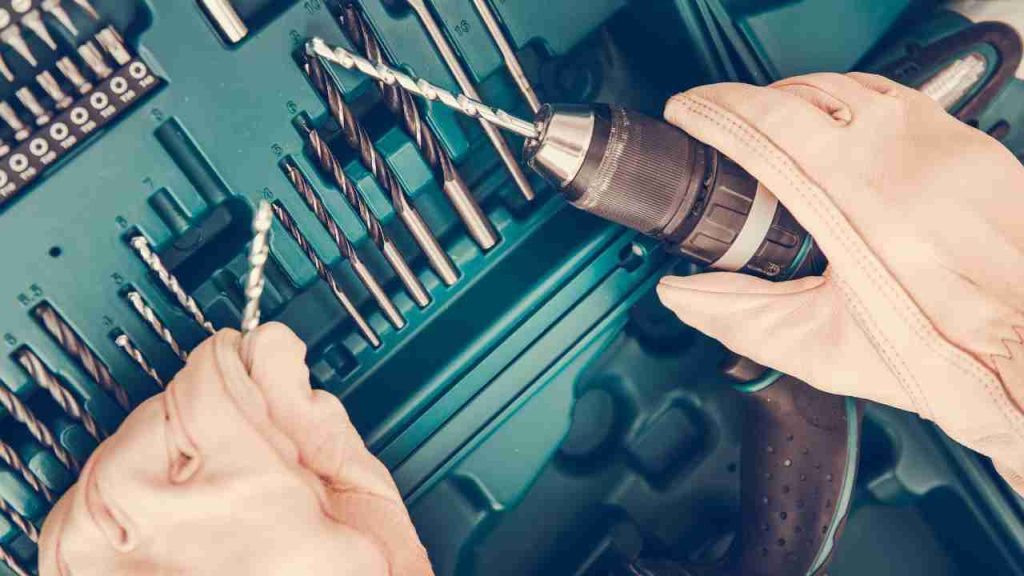
Step 3: Determine the chuck size.
The chuck size determines the number of drill bits used with your cordless drill. Most woodworking operations need a 3/8-inch chuck. However, a 1/2-inch chuck is more flexible and can accept bigger drill bits for heavy-duty applications.
Step 4: Examine more characteristics
Some cordless drills have features such as variable speed control, built-in LED lighting, and a hammer function. Although they aren’t required for your DIY drill press, they come in handy for other tasks and increase the total worth of your purchase.
Step 5: Read customer reviews and compare models.
Do some research on various cordless drill brands and models. Seek feedback from expert woodworkers and home improvement enthusiasts who have used the drills for comparable jobs. Take note of how they felt about battery life, power, and simplicity.
Step 6: Think about your budget.
Decide how much money you’re willing to spend on a cordless drill. Keep in mind that investing in a high-quality drill will not only improve the performance of your DIY drill press but will also serve you well in future projects.
Step 7: Make your choice.
Choose the cordless drill that best meets your needs, tastes, and budget while building a DIY drill press. Consider power, torque, battery life, chuck size, and any other relevant factors.
Step 8: Buy your preferred cordless drill.
After you’ve decided, go to your local hardware store or go online to get the cordless drill. To optimize your investment, look for special deals, discounts, or packaged packages that may include additional batteries or accessories.
Step 9: Put the cordless drill to the test.
When you buy your cordless drill, put it through a few simple activities to confirm it works correctly and feels comfortable in your hand. Familiarize yourself with its features, speed settings, and other capabilities that could be useful for your DIY drill press or other tasks.
10. Collect the remaining supplies and tools.
Gather the remaining materials and equipment indicated in the “Materials and Tools Required” section while holding your cordless drill. Before assembling your DIY drill press, double-check you have everything you need.
Step 11: Prepare your workplace.
Set up your DIY drill press in a clean, well-lit, organized workstation. Ensure you have enough room to work and all required equipment and supplies are nearby.
Getting the Work Surface Ready:
Follow these easy steps to prepare the work area for your DIY drill press:
- Choose the proper material: Select plywood and MDF board for your work surface. Both are strong and appropriate for a variety of purposes. Plywood is more moisture resistant, although MDF has a smoother surface.
- Measure and cut: Determine the work surface size based on your project requirements and available workspace. Mark the measurements on the selected material using a ruler or tape measure, and then cut the board with a circular saw, table saw, or handsaw.
- Fix the work surface: Place the cut board onto the drill press stand’s base. Drill pilot holes in the designated locations, then use wood screws to secure the worktop to the foundation. Ensure everything is aligned and level when marking the screw hole placements with a pencil or marker.
Instructions for Assembly in 8 Steps:
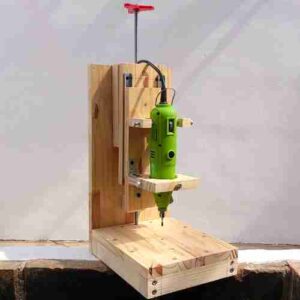
Step 1: Put together the drill press stand.
Unpack the drill press stand and install the base and column according to the manufacturer’s instructions. If you create your stand, cut the appropriate wood or metal components and join them using screws or bolts.
Step 2: Install the drill holder.
Depending on the configuration of your drill press stand, mount the drill holder to the top of the column or arm. Ascertain that it is secure and that it may be adjusted vertically along the column.
Step 3: Put the cordless drill away.
Put your cordless drill into the drill holder with the chuck pointing down. Tighten the clamp or screws on the holder to ensure the drill is securely placed.
Step 4: Get the work surface ready.
For your work surface, measure and cut a piece of plywood or MDF to the necessary size. Check that it is large enough to hold your tasks but not too huge for your workstation.
Step 5: Assemble the work surface
Place the cut plywood or MDF on top of the base of the drill press stand. Drill pilot holes, then use wood screws to secure the work surface to the foundation. To guarantee an equal surface, use a level and mark the screw hole locations with a pencil or marker.
Step 6: Attach the C-clamp or drill press vise in step 6.
Secure the work surface with a C-clamp or drill press vise. This will secure your workpiece in place during drilling. Check that the clamp or vise is appropriate for the thickness of your work surface and the materials you’ll be using.
Step 7: Change the height of the drill press.
Slide the drill holder along the column until your workpiece reaches the correct height. While the drill is not in use, ensure adequate space between the drill bit and the work surface.
Step 8: Put the Homemade drill press to the test.
Insert a drill bit into the chuck of the cordless drill and lock it in place. Clamp a scrap piece of wood or other material to the work surface with the C-clamp or drill press vise. Turn on the cordless drill and slowly lower it into the material to drill a hole. To produce precise and clean results, adjust the speed, height, and clamping pressure as required.
 Homemade Drill Press Improvements:
- A depth stop lets you establish a specified drilling depth, guaranteeing consistent and accurate holes across different workpieces. You may add a basic depth stop to your drill press stand by connecting a threaded rod and collar, or you can build a more complicated system with a sliding mechanism and locking knobs.
- Installing a laser guide: A laser guide may increase accuracy by projecting a visible crosshair onto the work surface, showing the drill bit’s contact location. You may buy a separate laser guide and place it on your drill press stand or adapt an existing laser level to do the same thing.
- Including a movable work light: Adequate illumination is essential for precision drilling, particularly when working on delicate or elaborate tasks. Consider utilizing an LED light with a flexible arm for optimal mobility and energy economy. Adding an adjustable work light to your drill press stand guarantees that your work area is well-lit and decreases eye strain.
- Including a dust collecting system: Drilling may generate a lot of dust and debris, making your workstation seem unsightly and offering a health concern if breathed. You can keep your work environment clean and reduce airborne particles by installing a dust collecting system into your DIY drill press.
- Connect a shop vacuum to the drill press stand or build a bespoke dust-collecting cowl that directs trash away from the drilling area.
Best Principles for Safety:
Use safety glasses or goggles to protect your eyes from flying debris. Wear earplugs to reduce noise exposure and gloves to protect your hands from sharp edges and splinters.
- Keep the work environment clean and organized: To reduce the chance of accidents, keep your workstation clean and clutter-free. Keep equipment and supplies tidy and easily accessible, and immediately clean up trash or spills.
- Ascertain that the drill press is secure and stable: Ascertain that your DIY drill press is set up on a stable and level surface and that the drill press stand is firmly secured to the work surface. Inspect your setup regularly for indications of wear or instability, and solve any faults as soon as possible.
- Choose the appropriate drill bit for the material: To achieve clean and precise holes, use the right drill bit for the material you’re dealing with. Using the correct bit may lead to better quality work, increased drill wear, and significant safety issues.
- Clamp the workpiece securely: While drilling, always use a C-clamp or drill press vise to keep the workpiece firmly in place. This keeps the material from sliding or whirling, which reduces the danger of damage and ensures correct results.
- Before lowering the drill, turn it on and let it reach maximum speed before lowering it into the workpiece. This procedure prevents the drill bit from snagging or catching on the material, resulting in a smoother drilling experience.
- Don’t push the drill: While drilling, apply consistent pressure but avoid using too much power, which might cause the drill bit to shatter or bind in the material. Let the drill and be patient while dealing with hard materials.
- Inspection and maintenance: Check your DIY drill press regularly for indications of wear, damage, or loose components. To guarantee maximum performance and safety, clean and maintain the drill press as required.
Frequently Asked Questions (FAQs)
1. Can any cordless drill be used to make a drill press?
Yes, most cordless drills can be used to make a drill press. However, it’s essential to choose a drill with the right power, torque, and chuck size to handle the tasks you plan to work on. Ensure the drill has a good battery life and fits securely in the drill holder of your drill press stand.
2. Is a DIY drill press as accurate as a store-bought drill press?
A well-built DIY drill press can be very accurate, but it may not match the precision of a store-bought drill press, especially high-end models. The accuracy of your DIY drill press will depend on the quality of the components you use, the stability of the stand, and how well you align and secure the work surface.
3. Can I use my DIY drill press for metalworking?
Yes, you can use your DIY drill press for metalworking, provided you have a powerful cordless drill with enough torque and the correct drill bits for metal. Keep in mind that drilling into metal requires slower speeds and more pressure than woodworking, so adjust your drilling technique accordingly.
4. How do I maintain my DIY drill press?
Regularly inspect your DIY drill press for signs of wear, damage, or loose components. Clean and maintain the drill press as needed, including the cordless drill, drill holder, work surface, and clamps. Ensure the drill press stand is stable and secure, and replace any worn or damaged parts promptly.
5. Can I add more features to my DIY drill press?
Yes, you can add more features to your DIY drill press, such as a depth stop, laser guide, movable work light, and dust collection system. These improvements can enhance the functionality and accuracy of your drill press, making it more versatile and useful for various projects.
Last words:
That’s all there is to it, guys! We’ve shown you how to convert your beloved cordless drill into a multipurpose DIY drill press. You’ll be able to handle various woodworking and metalworking jobs with enhanced accuracy and stability if you follow our step-by-step instructions without spending a fortune on a specialized drill press.
We’ve also given some safety precautions and recommended practices to keep you safe while working on your projects. Moreover, if you want to take your DIY drill press to the next level, our proposed improvements may increase its usefulness even further.
So, what are you holding out for? Get your cordless drill and start your drill press right now. We can’t wait to hear about your experience and see the incredible creations you’ll develop with your new DIY equipment. Everyone has a good time drilling!
- Where are WEN drill presses made? - April 2, 2023
- Where are Rikon drill presses made? - April 1, 2023
- Where are Powermatic drill presses made? - April 1, 2023