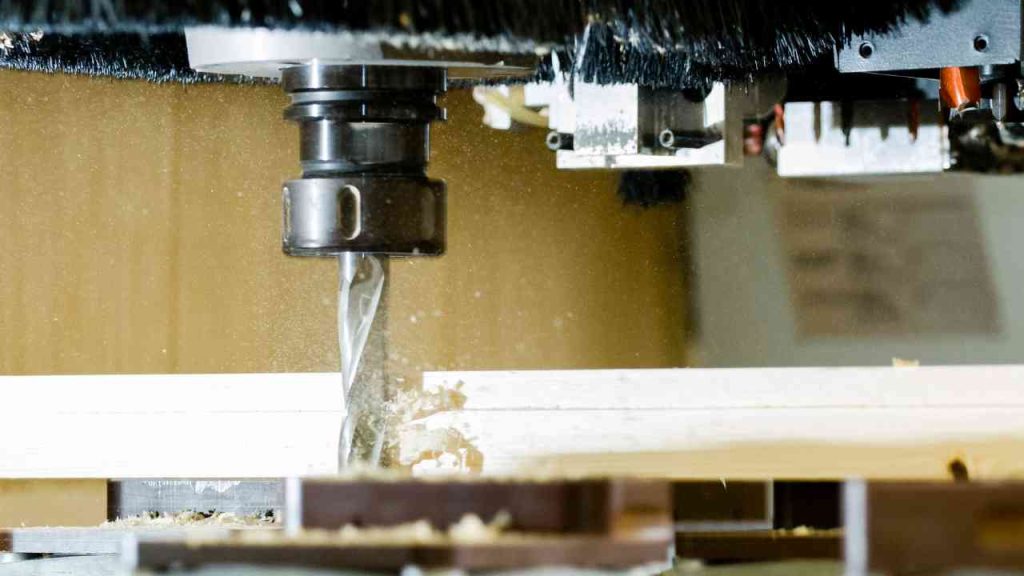
A cheap option to access milling capabilities at home or in a small workshop is to convert a drill press into a milling machine. While a milling machine employs a rotating cutting tool to remove material from a workpiece, a drill press is a stationary instrument that holds and rotates a drill bit or other cutting tool.
A drill press may be converted into a milling machine by making a few adjustments, enabling the operator to do operations like drilling, contouring, and slotting. Before performing the conversion, it’s crucial to analyze the drill press’s capabilities and limits and to take the necessary safety measures while operating the finished equipment.
 How to convert a drill press into a Milling machine?
Necessary materials and tools for conversion:
- Milling table
- Milling head
- Chuck key
- Screwdrivers
- Clamps
- Other tools: Depending on the specific conversion process, you may need tools such as a hammer, drill bits, or a tap and die set.
5 Steps for converting a drill press into a Milling machine:
- Assemble the materials and tools required.
- Remove the chuck from the drill press: Loosen the chuck from the spindle using the chuck key. You may need to gently pound the chuck with a hammer if it’s stuck to release it. After the chuck has come free, take it off the spindle.
- Install the milling table onto the drill press table by placing it there and lining up the T-slots on the milling table with the slots on the drill press table.
- Bolts and washers are used to fasten the milling table to the drill press table firmly. Verify that the bolts are torqued to the proper degree.
- Attach the milling head onto the drill press spindle: Adapters or spindle modifications may be necessary, depending on the milling head you’re using. Once the milling head is in position, tighten it firmly to the spindle following the manufacturer’s recommendations.
- Make any required adjustments to the milling table and head to make sure they are straight and working correctly.
- Check and calibrate the converted milling machine: Perform a basic milling operation on a piece of material, such as drilling a hole or creating a slot to test the converted milling machine. Make changes or repairs to ensure the machine runs smoothly and precisely.
Safety Considerations:
When turning a drill press into a milling machine and when utilizing the finished product, there are several safety precautions to bear in mind. Here are a few illustrations:
- When operating the milling machine, put on the proper personal safety equipment (PPE), such as gloves, eye protection, and hearing protection.
- Check that the drill press is steady and strong enough to withstand the added stresses and vibrations associated with milling jobs.
- Install and operate the milling table and head according to the correct procedures. This may include correctly aligning the milling head and table, tightening nuts and screws to the proper torque, and securing the workpiece with clamps or other restrictions.
- When using the milling machine, use care. Avoid touching your hands or other body parts with the spinning cutting tool or its moving components.
- Use appropriate lubrication and maintenance methods and materials. Maintaining the machine’s cleanliness and functionality requires adhering to the manufacturer’s instructions for lubrication.
3 Tips for successful conversion and use:
1. Make sure the drill press is sturdy and stable enough to handle milling tasks: Make sure the drill press is strong and solid enough: Ensure that the drill press you are converting is strong and steady enough to undertake milling activities. Milling entails exerting a lot of force and torque on the cutting tool and workpiece, which may put a lot of stress and vibration on the machine. During milling operations, a weak drill press may vibrate excessively or even shatter, which may be harmful and result in harm to the tool or the workpiece.
2. Use high-quality, durable materials: Using strong, long-lasting materials may assist assure a successful, durable conversion of a drill press into a milling machine. For instance, a solid and durable milling table, a well-constructed milling head, sturdy nuts and screws, etc.
3. Follow proper safety precautions: Utilize adequate safety measures: When using a milling machine that has been converted, using correct safety precautions is crucial. When milling, a rotary cutting tool is utilized, which, when misused, may be harmful.
Frequently Asked Questions (FAQs)
1. Can any drill press be converted into a milling machine?
Not all drill presses are suitable for conversion into a milling machine. It is essential to choose a sturdy and stable drill press that can handle the added stress and vibrations associated with milling tasks. It’s also crucial to ensure that the drill press has a compatible spindle and table for attaching the milling head and milling table.
2. How much does it cost to convert a drill press into a milling machine?
The cost of converting a drill press into a milling machine depends on the specific materials and tools required for the conversion. Some of the necessary items include a milling table, milling head, chuck key, screwdrivers, and clamps. The total cost can vary depending on the quality of these components and any additional tools or modifications needed for the conversion.
3. Can a converted drill press perform all the tasks of a dedicated milling machine?
While a converted drill press can perform many milling tasks, it may not be as versatile or precise as a dedicated milling machine. The conversion may have limitations in terms of spindle speed, accuracy, and rigidity compared to a purpose-built milling machine. However, for hobbyists and small workshops, a converted drill press can still be an affordable and practical solution for basic milling operations.
4. How difficult is it to convert a drill press into a milling machine?
The difficulty of converting a drill press into a milling machine depends on the specific drill press model and the conversion process. Some conversions may be relatively straightforward, requiring only the attachment of a milling table and milling head. Others may require more complex modifications or adaptations to the spindle or table. It’s essential to research the conversion process for your specific drill press and gather the necessary tools and materials before starting the project.
5. Is it safe to use a converted drill press as a milling machine?
Using a converted drill press as a milling machine can be safe if proper safety precautions are followed. Ensure that the drill press is sturdy and stable enough to handle the milling tasks, and install and operate the milling table and head according to the correct procedures. Always wear appropriate personal safety equipment (PPE) while operating the milling machine and follow proper maintenance and lubrication practices.
Read More: Can you use a plunge router as a drill press?
Final Words
An affordable option to add milling capabilities to your home or small workshop is to convert a drill press into a milling machine. You may modify a drill press to accomplish drilling, slotting, and contouring by following a few procedures and utilizing the right materials and equipment.
Before performing the conversion, it’s crucial to thoroughly analyze the drill press’s capabilities and limits and take the necessary safety measures while operating the finished equipment.
Converting a drill press into a milling machine can be gratifying and enjoyable with proper planning and forethought. We advise anybody interested in tackling this endeavor to thoroughly investigate the conversion procedure and acquire the required supplies and equipment. If you have any queries or concerns, speak with a professional or consult some educational materials.
- Where are WEN drill presses made? - April 2, 2023
- Where are Rikon drill presses made? - April 1, 2023
- Where are Powermatic drill presses made? - April 1, 2023

