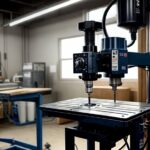
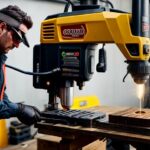
Drilling straight and vertical holes is necessary for every do-it-yourselfer or a professional carpenter. A drill press is a useful instrument that makes this operation much easier, but only some have one.
Whether you’re working on a little project at home or on a job site, knowing how to drill vertical holes without a drill press is essential. In this blog article, we’ll guide you through the procedures and share tips and techniques to help you obtain professional-looking results without a drill press. Grab your drill and safety glasses, and let’s start!
The issue of not having access to a drill press is as follows:
A drill press ensures accuracy and precision, but only some have the room or cash for one. Access to a drill press may be a significant barrier for DIY enthusiasts and professionals who need to drill straight and vertical holes.
Drilling vertical holes may be challenging and irritating, particularly if you’re working on a project that needs many holes in the same location.
Without a drill press, it’s possible to wind up with slanted or crooked holes, which may destroy the aesthetic and integrity of your completed product. Knowing how to drill vertical holes without a drill press is critical to achieving the necessary results.
 Materials and tools required:
- Drill: If you don’t have a drill press, you’ll need a drill to drill vertical holes. Depending on your desire and the sort of job, you may use either a cordless or a corded drill.
- Drill bits: Various materials need different drill bits. Drilling into the wood, for example, requires a different kind of drill bit than drilling into metal. Check that you have the correct drill bit for your job.
- Clamps: Clamping the workpiece to a sturdy surface is essential to prevent it from sliding when drilling. Depending on the size and kind of workpiece, you may use a vise or a clamp. This will assist you in creating a straight and vertical hole.
- A square or straight edge guarantees to drill in a straight line. This tool may mark where you wish to drill the hole and ensure that it is straight after you’ve drilled it.
- A level is a useful instrument for determining whether or not your workpiece is straight and level. This will assist you in creating a vertical hole.
- You’ll need a pencil or marker to indicate where to drill the hole.
- While drilling, safety glasses are essential. These shield your eyes from flying debris while you’re drilling.
- The workpiece is the substance into which you will drill. Depending on your project, this might be wood, metal, plastic, or any other material.
- Optional scrap material: Scrap material is a piece you may drill on before beginning your main project. This will assist you in getting a feel for the drill and improving your technique.
Marking and measuring the location of the drill hole:
- Identify the hole’s location: Choose a location for the hole and mark it with a pencil or marker.
- Determine the depth of the hole: Use a measuring tape or a ruler to measure the depth of the hole that has to be drilled. Put a mark on the drill bit to indicate the depth required.
- Inspect for straightness: Use a square or straight edge to ensure the area where the hole will be drilled is straight. This will assist you in making a straight hole.
- Examine the level: Make sure the workpiece is level by using a level. This will assist you in creating a vertical hole.
- Mark the hole’s position, depth, and level using a pencil or marker once you’ve identified its location, depth, and level.
Drilling vertical holes without a drill press: Step-by-step instructions:
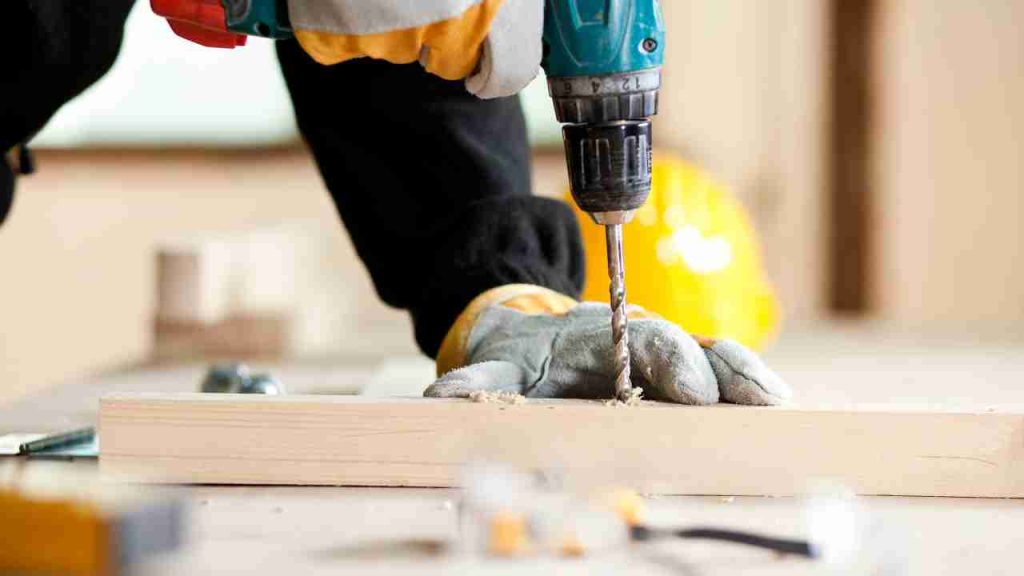
- Clamping the workpiece to a stable surface, such as a workbench or table: Clamp the workpiece to a sturdy surface, such as a workbench or table. This will keep the workpiece from sliding as you drill, allowing you to drill a straight and vertical hole.
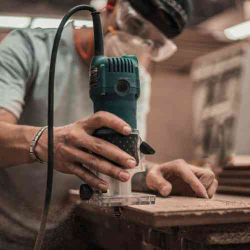
- Using a hand drill: Put the drill bit into the hand drill’s chuck. Make sure that the drill bit is firm and secure.
- Hold the drill at a 90-degree angle to the workpiece to maintain a vertical angle. This will assist you in creating a vertical hole.
Drilling the hole:
- Begin drilling the hole with the drill.
- Drill gently and with consistent pressure.
- Do not push the drill since this might shatter the drill bit or harm the material.
Checking for straightness: Stop the drill regularly and use a square or straight edge to examine the hole for straightness. If the hole is not straight, change the drill angle and keep drilling.
Checking the depth of the hole: Use the mark you created on the drill bit to determine the depth of the hole. When you reach the specified depth, stop drilling.
Techniques and tips:
- Employ a scrap piece of material as a guide to help you maintain a vertical angle when drilling. Clamp the scrap material to the workpiece and drill through both.
- Drill on scrap material first: Drill on waste material before beginning your main project. This will assist you in gaining a feel for the drill and improving your technique.
- Slow down the drill speed: A straighter hole may be achieved by slowing down the drill speed. It also reduces the possibility of the drill bit failing or the material being damaged.
- Use a level to check for verticality: Use a level to examine the verticality of the hole regularly. This will assist you in correcting any discrepancies and creating a vertical hole.
- Provide yourself plenty of time: Drilling should be quick. Drill gently and carefully to prevent harming the workpiece or the drill bit.
Safety precautions:
- Use safety glasses: Flying debris may cause significant eye damage; therefore, wear safety glasses when drilling to protect your eyes.
- Attach the workpiece to a sturdy surface to prevent it from shifting while drilling. This will assist you in achieving a straight and vertical hole and avoiding mishaps.
- Employ a level: To prevent drilling at an angle, ensure the workpiece is level before drilling.
- Provide yourself plenty of time: Drilling should be quick. Drill gently and carefully to prevent harming the workpiece or the drill bit.
- Disconnect the drill: If you’re using a corded drill, remember to unplug it while not in use. This will avoid mishaps caused by inadvertent start-ups.
- Employ the proper drill bit: Be certain you use the correct drill bit for the material you are drilling into. Using the incorrect drill bit might result in the drill bit breaking or the material being damaged.
- Keep your hands away from the drill: When the drill is in operation, keep your hands away from it. Stop the drill and remove the trapped drill bit before proceeding.
- After you’re done drilling, make sure you put your equipment away appropriately. This will avoid mishaps and help your tools last longer.
Frequently Asked Questions (FAQs)
1. Can I drill straight holes with a handheld drill?
Yes, you can drill straight holes with a handheld drill by following the techniques mentioned in this article. Using a square or straight edge, a level, and proper clamping will help ensure accuracy and precision.
2. What type of drill bit should I use for different materials?
Different materials require different drill bits. For example, wood requires a wood drill bit, metal requires a metal drill bit, and masonry requires a masonry drill bit. Always use the appropriate drill bit for the material you are working with to avoid damaging the material or the drill bit.
3. How can I ensure that my hole is vertical without a drill press?
You can ensure that your hole is vertical by using a level to check the workpiece’s level and a square or straight edge to check the hole’s straightness. Regularly check the verticality of the hole while drilling and adjust the drill angle as needed.
4. What safety precautions should I take while drilling without a drill press?
Some safety precautions to take while drilling without a drill press include wearing safety glasses, clamping the workpiece securely, using the correct drill bit for the material, keeping your hands away from the drill, and unplugging the drill when not in use.
5. Can I use a cordless drill to drill vertical holes?
Yes, you can use a cordless drill to drill vertical holes. The techniques and tips mentioned in this article apply to both cordless and corded drills. Just make sure that your cordless drill has enough power and battery life to complete the task.
6. How can I practice drilling vertical holes without ruining my workpiece?
You can practice drilling vertical holes on scrap material before starting your main project. This will help you get a feel for the drill and improve your technique without risking damage to your primary workpiece.
Last words:
It might not be easy to drill vertical holes without a drill press, but you can obtain professional-looking results with the correct equipment, materials, and procedures. Following the methods in this blog article, you may confidently prepare yourself and your workstation, mark and measure the hole’s location, and drill a vertical hole.
To get the greatest results, take your time, use a level to check for verticality, and slow down the drill speed.
Knowing how to drill vertical holes without a drill press is a crucial ability that will come in helpful on many tasks, whether you’re a DIY enthusiast or a professional carpenter. So, take your drill and go to work right now! You may enhance your technique by integrating these tips and techniques and attain even greater outcomes.
- Where are WEN drill presses made? - April 2, 2023
- Where are Rikon drill presses made? - April 1, 2023
- Where are Powermatic drill presses made? - April 1, 2023