Do you want to improve your woodworking skills by creating smoother, more level surfaces? You’ve come to the correct location! Today, we’ll show you how to makea drum sander for your drill press. This handy addition will save you time and money and give you the pleasure of knowing you constructed it yourself.
A drum sander is a flexible equipment that may help you obtain professional-quality results even if you’re only a weekend warrior. It’s ideal for sanding curved or uneven surfaces, smoothing off rough edges, and giving your projects the desired polished finish. What’s more, the finest part?
You don’t have to shell out big bucks for a standalone drum sander. You can create a custom attachment for your drill press with a few basic materials and tools. So, let’s begin with our step-by-step guide to building your drum sander!
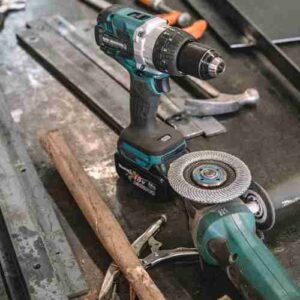 Materials and Tools:
Materials:
- Sandpaper: Get a few sandpaper sheets in varying grades to meet your diverse woodworking requirements. A solid grit selection will help you readily handle anything from rough shaping to delicate finishing.
- PVC pipe or wooden dowel: This will function as the drum sander’s core. PVC pipes are more durable, although wooden dowels are lighter and easier to use. Select a diameter that meets your needs and fits snugly in your drill press.
- Hose Clamps: These useful accessories securely attach your sandpaper to your drum. To accommodate the thickness of the sandpaper, use clamps that are bigger than the diameter of your selected pipe or dowel.
- Wood Screws: A few wood screws will be required to connect the sanding table firmly to your drill press.
- Scrap Plywood or MDF Board: Use this to build a stable and level sanding table to hold your workpieces while using the drum sander.
Tools:
- Drill Press: The primary tool you’ll utilize, a drill press, is required to install and operate your drum sander.
- Hacksaw or Pipe Cutter: You’ll need a hacksaw or pipe cutter to cut your PVC pipe or wooden dowel to the correct length.
- Screwdriver: You’ll need a dependable screwdriver to secure the sanding table and adjust the hose clamps.
- Scissors or a utility knife: These will be needed to trim the sandpaper sheets to fit your drum sander.
- Ruler or Measuring Tape: Accuracy is essential, and having a trustworthy measuring instrument on hand helps guarantee that your drum sander components fit perfectly.
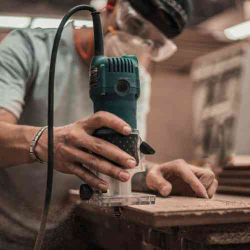
Creating the Drum Sander:
Now that you’ve gathered all of your supplies and equipment, it’s time to get started on the exciting part: making the drum sander! Following these simple procedures, you’ll soon have a custom-made drill press drum sander attachment that will take your woodworking projects to the next level. Let’s get this party started!
- Cutting the PVC Pipe or Wooden Dowel: Cut your material (PVC pipe or wooden dowel) to your desired length. This will be determined by the breadth of the workpieces you want to sand. Trim the pipe or dowel to size using a hacksaw or pipe cutter, being sure to make a clean and level cut.
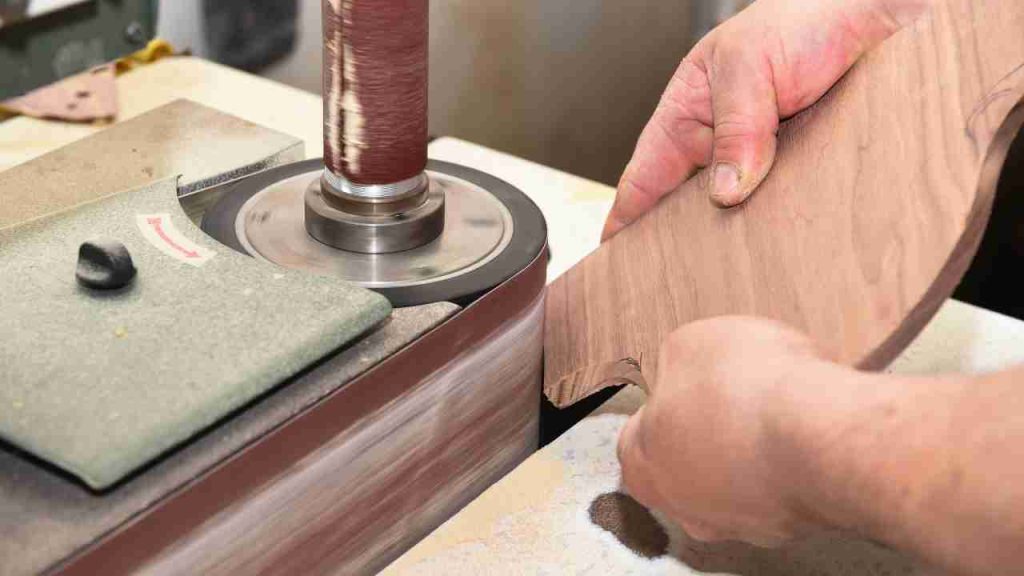
- Attaching the Sandpaper: The sandpaper should now be attached to your drum. Cut a sandpaper strip to wrap around the pipe or dowel, allowing a tiny overlap for a firm attachment. Be careful to choose the proper grit for your job.
Wrap the sandpaper around the pipe or dowel using a hose clamp to ensure it’s aligned and smooth. Tighten the hose clamp after the sandpaper is positioned to keep it firmly against the drum. Repeat on the opposite end of the drum to ensure the sandpaper is equally fastened.
- Assembling the Drum Sander:After your drum is finished, it’s time to put it on your drill press. Insert the drum carefully into the drill press chuck, ensuring it’s centered and secure. Tighten the chuck to secure the drum. Check the drum’s alignment and balance, and make any required modifications to guarantee smooth and consistent sanding performance.That’s all there is to it! You’ve successfully built a drill press drum sander. Let’s make a sanding table to help you support your workpieces and improve your sanding skills.
Building the Sanding Table:
When you’ve installed and tested your drum sander, it’s important to construct a solid sanding table to hold your workpieces throughout the sanding operation. This necessary addition to your setup will give a sturdy surface, making it simpler to get accurate and even outcomes. Let’s get started on making your sanding table!
- Cutting and Preparing the Plywood or MDF Board: Begin by measuring and marking the measurements of your sanding table on a scrap piece of plywood or MDF board. Remember that the size should be big enough to hold the workpieces you want to sand comfortably. Cut the board following the indicated lines using a saw, ensuring the edges are straight and clean.
- Creating an Opening for the Drum Sander: You’ll need to cut an aperture in your sanding table to allow the drum sander to pass through. Mark the middle of the table, then sketch the shape of the drum, leaving a little gap for easy rotation. Use a jigsaw or a hole saw to cut out the opening, ensuring it’s clean and even for optimal performance.
- Attaching the Table to the Drill Press: Attach the sanding table to the drill press. Align the table with the drum sander so the drum goes through the aperture with as little friction as possible. Clamp the table to verify that it is sturdy and level. Drill pilot holes through the sanding table and into the drill press table while the table is in place, then attach the two parts with wood screws.
- Adding an Adjustable Fence (Optional): Improve your accuracy and control by adding an adjustable fence to your sanding table. Cut a straight, clean piece of plywood or MDF to act as the fence. Screw or fasten the fence to the sanding table for simple adjustment to fit various workpieces and sanding angles.
Operating and Maintaining Your Drum Sander:
- Safety Tips and Precautions: Prioritizing safety before beginning any sanding activity is critical. Always use appropriate safety equipment, such as safety glasses, a dust mask, and hearing protection. Ensure your workplace is well-lit, clutter-free, and sturdy, and always disconnect your drill press before making any changes.
- Using the Drum Sander: When you’ve secured your safety equipment, you may begin operating your drum sander. Adjust the sanding table and fence (if installed) to fit the size and form of your workpiece, making sure it’s well-supported and solid. For consistent results, turn on the drill press and carefully feed the workpiece into the drum sander, providing equal pressure and moving slowly. Adjust the grit of the sandpaper as required to get the appropriate degree of smoothness.
- Maintaining Your Drum Sander: Frequent maintenance is essential for maintaining your drum sander in excellent operating order. Clean the drum and sanding table after each use to eliminate dust or dirt. Inspect the drum for wear or damage regularly, and replace the sandpaper when worn or useless. Check the sanding table for warping or damage, and make sure the drum is correctly aligned and balanced in the drill press chuck.
Frequently Asked Questions (FAQs)
1. Can I use a metal pipe instead of a PVC pipe or wooden dowel for the drum sander?
Yes, you can use a metal pipe for the drum sander. However, keep in mind that metal pipes are heavier and may require additional support. Ensure that the metal pipe fits securely in your drill press and that it is properly balanced to avoid any issues during operation.
2. What grit sandpaper should I use for my drum sander?
The grit of sandpaper you should use depends on the specific project and the desired finish. For rough shaping and removing material quickly, use a lower grit (e.g., 60 or 80 grit). For smoothing and finishing, use a higher grit (e.g., 180 or 220 grit). It’s a good idea to have a variety of grits on hand to accommodate different projects and needs.
3. How do I change the sandpaper on my drum sander?
To change the sandpaper on your drum sander, first, loosen the hose clamps securing the sandpaper to the drum. Carefully remove the old sandpaper and replace it with a new strip of the desired grit. Ensure the sandpaper is aligned and smooth before tightening the hose clamps to secure the new sandpaper in place.
4. Can I use my drum sander for both wood and metal projects?
While a drum sander can be used for both wood and metal projects, it’s essential to use the appropriate type of sandpaper for each material. For metal projects, use sandpaper specifically designed for metalworking. Additionally, be cautious when sanding metal, as it can generate heat and sparks, which may pose safety risks.
5. How can I prevent my drum sander from causing excessive dust?
To minimize dust production while using your drum sander, ensure your workspace is well-ventilated and consider connecting a shop vacuum or dust collection system to your drill press. Additionally, always wear a dust mask and safety glasses to protect yourself from airborne particles. Regularly clean your drum sander and sanding table to reduce dust buildup.
Final Words:
That’s all there is to it, guys! You’ve created a bespoke drum sander adapter and sanding table for your drill press using simple materials, tools, and a little elbow work. This DIY arrangement can save you money while also adding a professional touch to your woodworking projects with smoother, more equal surfaces.
Remember that practice makes perfect, so don’t be afraid to try out various drum sizes and grits to discover the best combination for your personal requirements. As you practice, you’ll realize the actual flexibility and utility of your DIY drum sander.
We hope you found this step-by-step guide helpful and that it inspires you to tackle even more DIY woodworking projects. With your newfound expertise, there’s no limit to the creative possibilities that lie ahead. So, go ahead and make some sawdust – happy sanding, everyone!
- Where are WEN drill presses made? - April 2, 2023
- Where are Rikon drill presses made? - April 1, 2023
- Where are Powermatic drill presses made? - April 1, 2023