As a DIY enthusiast, I know the importance of having accurate threads in my projects. That is why tapping with a drill press is one of my favorite techniques. Not only is it easy, but it also ensures precision and accuracy.
If you are new to tapping with a drill press, you may feel overwhelmed. But fear not! With the right tools, setup, and technique, tapping with a drill press can become a straightforward and enjoyable process.
Key Takeaways:
- Tapping with a drill press ensures accuracy and precision in your DIY projects.
- Learning the right tools, setup, and technique can make tapping with a drill press easy and enjoyable.
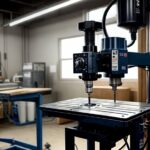
Tools and Setup for Drill Press Tapping
Before we get started with tapping, let’s discuss the necessary tools and setup you’ll need to achieve accurate threads.
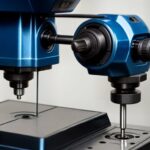
First and foremost, you’ll need a tapping attachment for your drill press. This attachment will secure your tap and guide it into the hole, ensuring precision and reducing the risk of breakage.
Next, make sure your tapping attachment is securely mounted to your drill press. Adjust the depth stop to control the depth of the hole and keep your tapping process consistent.
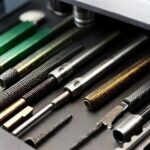
It’s also important to use the right tools for the job. Make sure your tap matches the thread size and pitch you’re tapping. Using the wrong size or pitch can result in stripped threads or a tap that’s broken off in the hole.
Finally, make sure your drill press is set to the correct speed for tapping. Too high of a speed can cause the tap to break, while too low of a speed can result in poor quality threads.
By following these guidelines and ensuring you have the right tools and setup, you’ll be on your way to tapping with precision and ease.
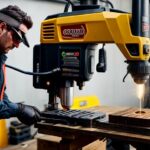
Tapping Technique for Drill Press
When it comes to tapping with a drill press, there are certain techniques that can help ensure accurate and precise threads. Let’s take a closer look at some of the best practices for achieving successful tapping results.
Speed and Pressure
One of the most important factors to consider when tapping with a drill press is the speed and pressure applied. The speed should be set at a moderate level, not too fast or too slow, to ensure smooth and steady tapping. Additionally, applying too much pressure can cause the tap to break or the threads to be damaged. It’s important to apply just enough pressure to keep the tap in place and allow it to do its job without putting too much force on the machine.
Lubrication
Using lubrication during the tapping process can help reduce friction and prevent the tap from overheating. A tapping compound or a light oil can be applied to the tap and the hole being tapped to ensure smooth and easy tapping. This will also help preserve the life of the tap and ensure accurate threads.
Backing Out
Another important technique to remember when tapping with a drill press is to periodically back out the tap during the process. This will help clear out any chips or debris that may have accumulated in the hole and prevent the tap from getting stuck. It’s important to back out the tap slowly and carefully to avoid damaging the threads already created.
Clamping
Proper clamping of the workpiece is crucial when tapping with a drill press. The workpiece should be firmly secured to the machine to prevent it from moving or vibrating during the tapping process. This will ensure accurate threads and prevent any damage to the machine or the workpiece.
By following these tapping techniques, you can achieve accurate and precise threads with your drill press. Remember to take your time, use proper lubrication, and back out the tap periodically to ensure successful tapping results.
Steps for Tapping With a Drill Press
Now that you have all the required tools and have properly set up your drill press for tapping, it’s time to get started! Follow these steps for accurate thread tapping:
- Secure your workpiece: Start by clamping your workpiece securely to the drill press table. This will prevent any movement during the tapping process, ensuring accurate threads.
- Select your tap: Choose the appropriate tap for the size and material of your workpiece. Insert the tap into the tapping attachment and secure it properly.
- Set the drill press speed: Adjust the drill press speed to the recommended RPM for the tap size and material. Check the tap manufacturer’s website for the correct speed for tapping.
- Start drilling: Slowly lower the tap until it touches the workpiece. Begin turning the chuck by hand, making sure the tap remains straight and perpendicular to the workpiece.
- Start tapping: Once you have a few threads started, you can stop turning the chuck by hand and allow the drill press to do the work. Keep applying even pressure and making sure the tap remains straight.
- Reverse the tap: Once you have reached the desired depth, reverse the tap to remove it from the workpiece.
- Clean your threads: Use a tap or thread cleaner to remove any debris from your threads.
Remember to take your time and work carefully during each step of the tapping process. Rushing can result in inaccurate threads and even damage to your workpiece.
Common Mistakes to Avoid When Tapping With a Drill Press
Tapping with a drill press can be a bit tricky, but avoiding common mistakes can help ensure a successful outcome. Here are some tips to help you avoid these mistakes:
- Not using a tapping attachment: Using a tapping attachment is crucial for drill press tapping. Without it, the tap can break or the threads can become misaligned.
- Using the wrong speed: Choosing the correct speed is important for successful tapping. If the speed is too high, the tap can break, and if the speed is too low, the threads can become uneven.
- Applying too much pressure: Applying too much pressure while tapping can cause the tap to break or the threads to become distorted. Use a light touch and let the tap do the work.
By avoiding these mistakes, you can achieve accurate threads and improve your drill press tapping technique.
Tapping With a Drill Press: Take Your DIY Projects to the Next Level
After reading this article, you should be ready to tackle drill press tapping with confidence. Remember to always carefully select the necessary tools, follow proper setup instructions, and use tapping techniques and best practices for accurate and successful threads.
Do not rush through the tapping process, and avoid common mistakes such as applying too much pressure or speed. Always take your time when tapping with a drill press, as the accuracy of your threads is crucial to the success of your DIY project.
Once you have mastered the art of tapping with a drill press, you will open up a whole new world of possibilities for your DIY projects. You will be able to create precise, threaded holes in a variety of materials, including metal, plastic, and wood.
Are You Ready to Tap With a Drill Press?
I encourage you to put the knowledge you have gained from this article into practice. Start small, and work your way up to more complex DIY projects. Don’t be afraid to experiment with different materials and techniques, and remember to always prioritize safety when using power tools.
With a little patience and practice, you will be able to achieve professional-level results with drill press tapping. So go ahead and take your DIY projects to the next level!
FAQ
Q: Can I tap with a regular drill press?
A: Yes, you can tap with a regular drill press. However, it is recommended to use a tapping attachment for better results.
Q: What tools do I need for drill press tapping?
A: To tap with a drill press, you will need a tapping attachment, a tap wrench, and the appropriate taps for your project.
Q: How do I set up my drill press for tapping?
A: To set up your drill press for tapping, ensure that the tapping attachment is securely attached to the drill press spindle. Adjust the speed and depth stop according to the type of material and tap size you are using.
Q: What is the best technique for drill press tapping?
A: The best technique for drill press tapping involves applying steady pressure and using the correct speed for the tap and material being used. It is important to let the tap do the work and avoid applying excessive force.
Q: What are the steps for tapping with a drill press?
A: The steps for tapping with a drill press include securing the workpiece, aligning the tap, adjusting the depth stop, applying cutting fluid, and carefully rotating the tap using the drill press.
Q: What are common mistakes to avoid when tapping with a drill press?
A: Common mistakes to avoid when tapping with a drill press include using too much force, not using enough cutting fluid, tapping at the wrong speed, and not properly aligning the tap.
- Delta Rockwell Drill Press 15 017: Your Ultimate Workshop Tool - August 21, 2023
- Rockwell 32 Radial Drill Press: The Ultimate Workshop Tool - August 21, 2023
- Best Drill Press for 80 Lower: Expert Advice and Top Picks - August 21, 2023