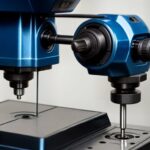
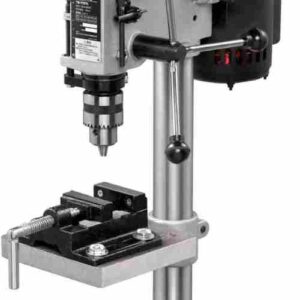
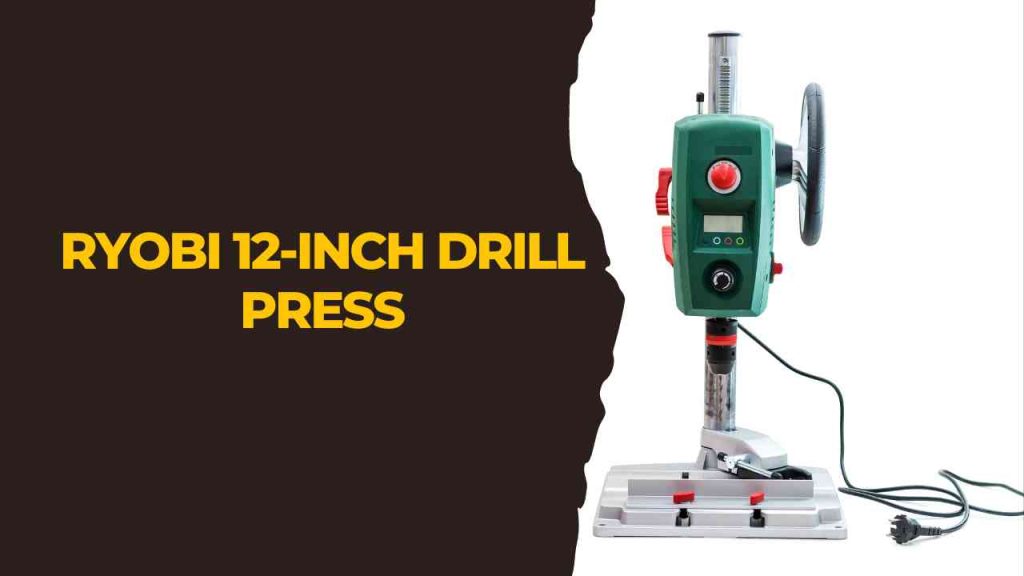
Anyone who wants to get serious about do-it-yourself needs to know about the Ryobi 12-inch drill press. There is no better complement to a garage or workshop than this strong and adaptable equipment. The Ryobi 12″ drill press is a versatile tool thanks to its strong engine and adjustable speed settings.
It works well for drilling into a wide variety of materials. It is perfect for any job thanks to the LED work light, digital display, variable speed control, and depth stop that can be adjusted.
 10 Key Characteristics of the Ryobi 12in drill press:
- 12-inch swing: The greatest distance between the drill press’s spindle and its chuck is 12 inches, or the “swing,” on the Ryobi 12-inch drill press. This opens the door to more ambitious drilling operations and a more comprehensive range of possible material sizes.
- Variable speed control: The drill press’s speed may change depending on drilled material. Because of this, the drilling process may be managed with more accuracy and precision.
- Laser alignment: To better align the drill bit with the mark, the 12in drill press is equipped with a laser alignment function that shines a laser beam onto the workpiece.
- Cast iron table: The drill press’s cast iron table is sturdy and long-lasting, making it ideal for precision work.
- Adjustable depth stop: A depth stop that the operator may adjust is included to prevent the drill bit from penetrating too far into the material.
- Rack and pinion table height adjustment: The Ryobi 12-inch drill press table is height-adjustable by rack and pinion, so you can set it to the perfect height for your workpiece.
- On-board storage for tools and accessories: The Ryobi 12-inch drill press includes convenient onboard storage for tools and accessories, so you can keep everything neat and in one place.
- Keyed chuck for secure and easy bit changes: The drill press’s keyless chuck makes switching out bits quick and straightforward, making it ideal for precision work.
- Durable, die-cast aluminum construction: Die-cast aluminum is used to create the Ryobi 12-inch drill press, making it a sturdy and long-lasting tool.
- Adjustable workpiece stop for repetitive drilling: The drill press’s workpiece stop may be adjusted to a predetermined position, making it ideal for repeated drilling.
What’s the price of Ryobi 12-inch drill press?
The retail cost of a Ryobi 12-inch drill press varies from store to store. The Ryobi 12-inch drill press is often marketed at a cheaper price than some of the more high-end versions on the market, yet it has many of the same capabilities. Hence it is generally regarded as an economic drill press.
The price is usually between $200 and $300, and it is sold at many different stores, including Home Depot, Lowes, Amazon, and many more. Prices might change depending on factors like location and promotions while making a purchase. Another factor that might affect the price is whether or not the drill press is being sold alone or in a bundle with additional equipment.
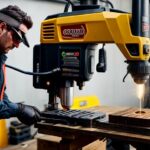
How to use Ryobi 12 inch drill press effectively?
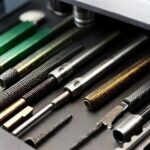
Accessories:
- Chuck key
- Adjustable depth stop
- Workpiece stop
- Table insert ring
- Laser alignment feature
- Dust collection bag
- Extra Belts
- Wrenches
- Drill press vise
Setting up the Ryobi 12 inch drill press:
- Put the drill press together per the instructions in the manual. The table, base, and all the extras can be set up in no time flat.
- After assembly, you should plug in the drill press and turn it on.
- Set the drill press speed appropriately for the material you’re working with.
- To utilize the laser alignment feature, place the workpiece on the table, and then align the drill bit with the mark.
- Adjust the table height using the rack and pinion system to suit the workpiece.
- An adjustable depth stop controls drilling depth.
- Fix the workpiece in a vice or clamp it.
- Insert the drill bit into the chuck by turning the key.
- First, turn on the drill and lower the bit.
- Just drill by pushing the handle. Apply gentle force, keeping the drill perpendicular to the workpiece.
- After you’re done drilling, you should unplug the drill and take out the workpiece.
- Please tidy up the drill press and any associated tools.
- When using a drill press, it’s important to take precautions by using protective gear, including goggles, earplugs, and a dust mask.
Step-by-step instructions:
- Set up the drill press following the manual’s directions. Typically, this entails putting together the tabletop and foundation and adding other components.
- The second step is to plug in the drill press and turn it on.
- Modify the drill press speed to fit the material you’ll be using.
- Align the drill bit with the mark on the workpiece by placing the piece on the table and using the laser alignment function.
- Adjust the table’s height using the rack and pinion mechanism to ensure its level with the workpiece.
- The drilling depth may be adjusted using the movable depth stop. 6.
- Use clamps or a vise to keep the workpiece in place on the table.
- Put the drill bit into the keyed chuck and turn the key to secure it.
- Afterward, activate the drill press and position the drill bit above the workpiece.
- Press the handle down to begin drilling. Be sure the drill bit is perpendicular to the surface you’re working on and apply little pressure.
- Turn off the drill press and take the workpiece off the table after drilling.
- After using the drill press, clean it and put away all of the equipment and attachments.
Safety precautions:
- Wear protective eyewear, earplugs, and a face mask while using a drill press to avoid injury.
- To prevent being trapped in the drill press’s moving components, avoid wearing loose clothes and removing jewelry, and keep long hair pulled back.
- Never let your fingers or hands near the drill bit while it’s in use.
- The space surrounding the drill press should be kept tidy and well-lit so that you don’t have to worry about tripping and can see the workpiece without any obstructions.
- Before beginning drilling, make sure the workpiece is tightly secured or kept in place, so it doesn’t move or shift.
- If you’re not using the drill press at the time, switch it off and remember to turn it back on until you are ready to use it again.
Maintenance:
- Keep the drill press clean and free of dust regularly for optimal performance. Use a soft cloth and light cleaning fluid to wipe off the device.
- Apply the recommended lubricant to the drill press’s table and spindle.
- Do not neglect to tighten any screws or nuts that may be slack.
- Repair or replace any broken or worn belts.
- Throw out that old chuck and get a new one.
- Fix or replace any frayed wires or motor parts.
- Examine and make necessary adjustments to laser alignment.
- The operator’s responsibility is to set the requisite depth and workpiece stops.
- Get the tools and equipment on board neat and in order.
- It would be best if you kept the drill press in a safe place while it’s not in use.
- Don’t throw away the user guide; you’ll need it for repairs and upkeep.
- When servicing or cleaning the drill press, be sure to turn off the power.
What You Should Know Before Buying a Ryobi 12-Inch Drill Press?
- Make sure the Ryobi 12-inch drill press has the features and capabilities you need by considering the jobs you want to use it for.
- I recommend researching the different versions available to guarantee you are receiving the best deal possible on the Ryobi 12-inch drill press.
- Read the warranty and return policy for the drill press to be sure you are protected in the case of a problem.
- 4 Before purchasing the Ryobi 12-inch drill press, it is recommended that you read internet reviews to get an idea of what other customers think of the product and how well it performs.
- Consider the drill press’s dimensions and weight, and clear a large space to handle it before buying one.
- Think about the drill press’s included accessories and whether or not you’ll really utilize them.
- Take a lesson or get instructions before utilizing a drill press if you need to learn how to use one.
- Take all necessary precautions while using the drill press, and be familiar with its capabilities and limits.
Disadvantages:
- Limited speed range: The Ryobi 12-inch drill press may be limited in the materials it can drill because of its lower speed range.
- Limited weight capacity: Heavy-duty drilling may be too much for the drill press, so keep that in mind.
- Lack of sophisticated features: The Ryobi 12-inch drill press could lack high-end features like digital readouts and complicated table adjustments seen in more expensive models.
Final Words
The Ryobi 12-inch drill press is a budget-friendly option for a workshop drill press. Its 12-inch swing and variable speed control fit woodworking and metalworking. Laser alignment improves drilling, while the cast iron table ensures durability and stability.
 The Ryobi 12in drill press is an affordable option for various projects. The longer it runs well, the fewer components you’ll need to replace. Read reviews, verify the warranty, and inspect the box to ensure it fulfills your project needs.
- Where are WEN drill presses made? - April 2, 2023
- Where are Rikon drill presses made? - April 1, 2023
- Where are Powermatic drill presses made? - April 1, 2023